How to enable Remote connection
How to enable Remote connection for a specific network in the app.
This guide explains how to enable Remote connection for a specific network in the app.
What this feature means
Section titled “What this feature means”After Remote connection is enabled, the network is prepared for remote access.
Step by step
Section titled “Step by step”1. Open the app
Section titled “1. Open the app”Open Spectoda Connect and sign in to your account.
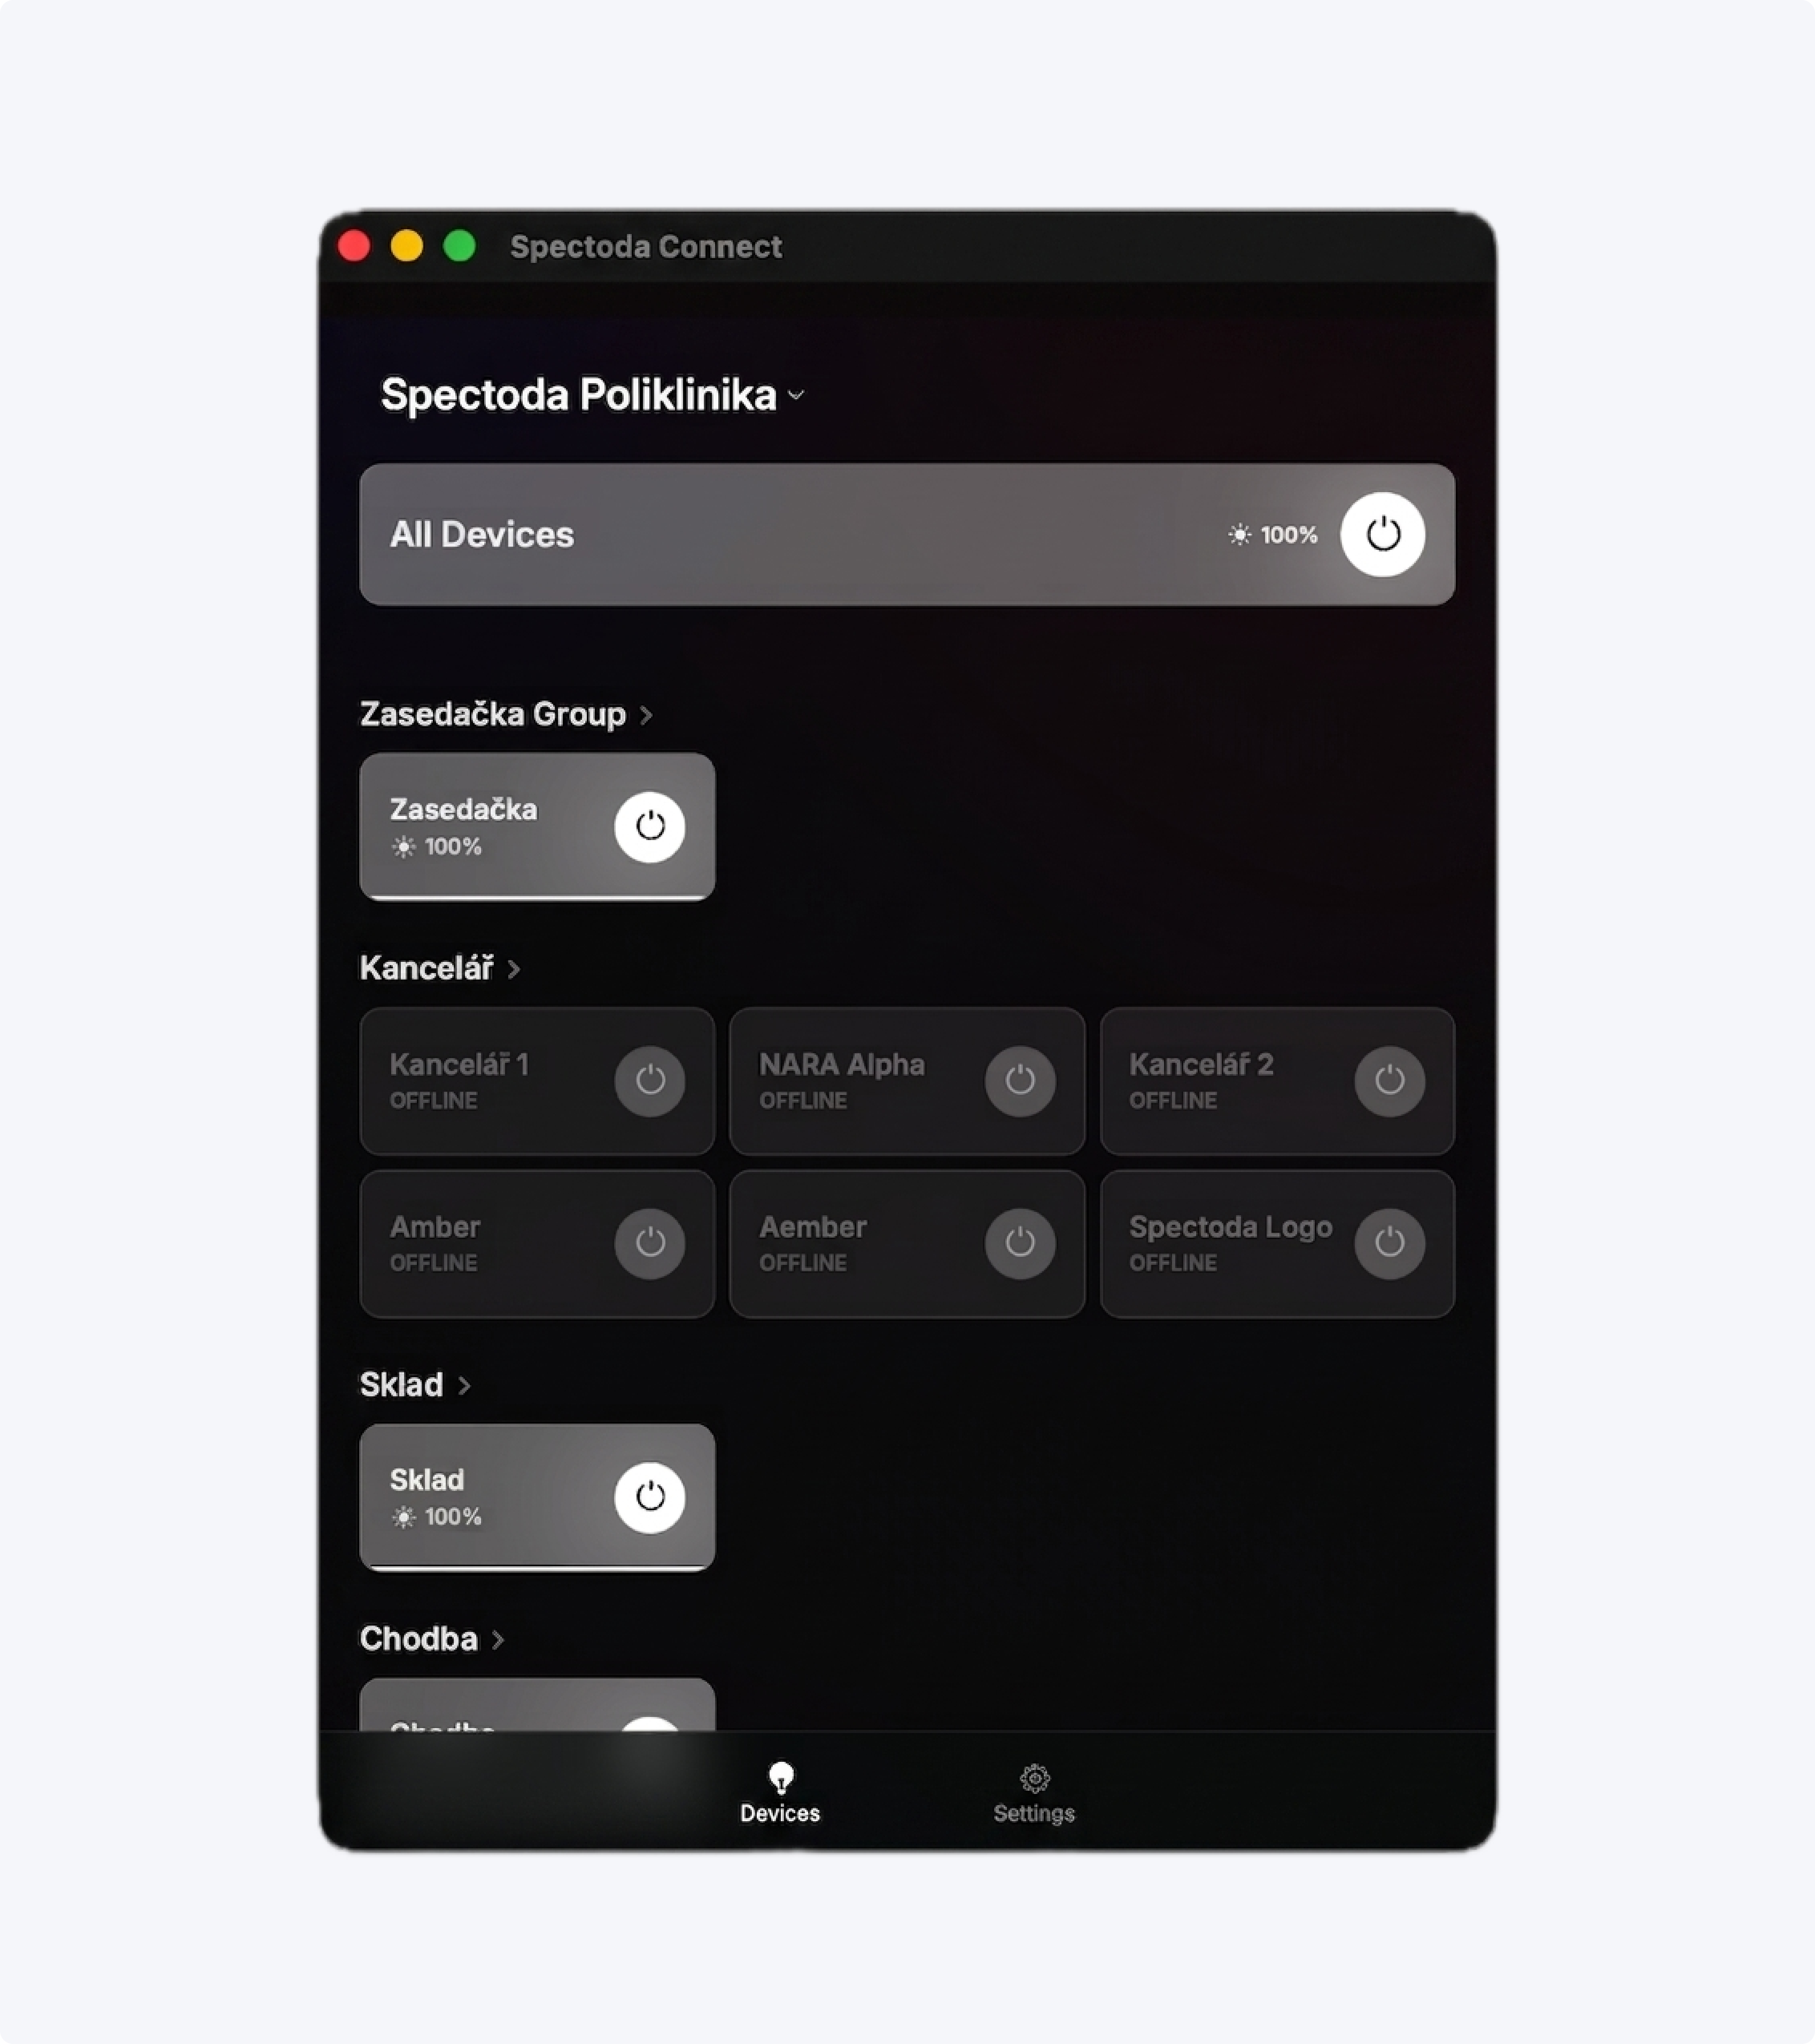
2. Open your network
Section titled “2. Open your network”In the list of networks, open the one where you want to enable Remote connection.
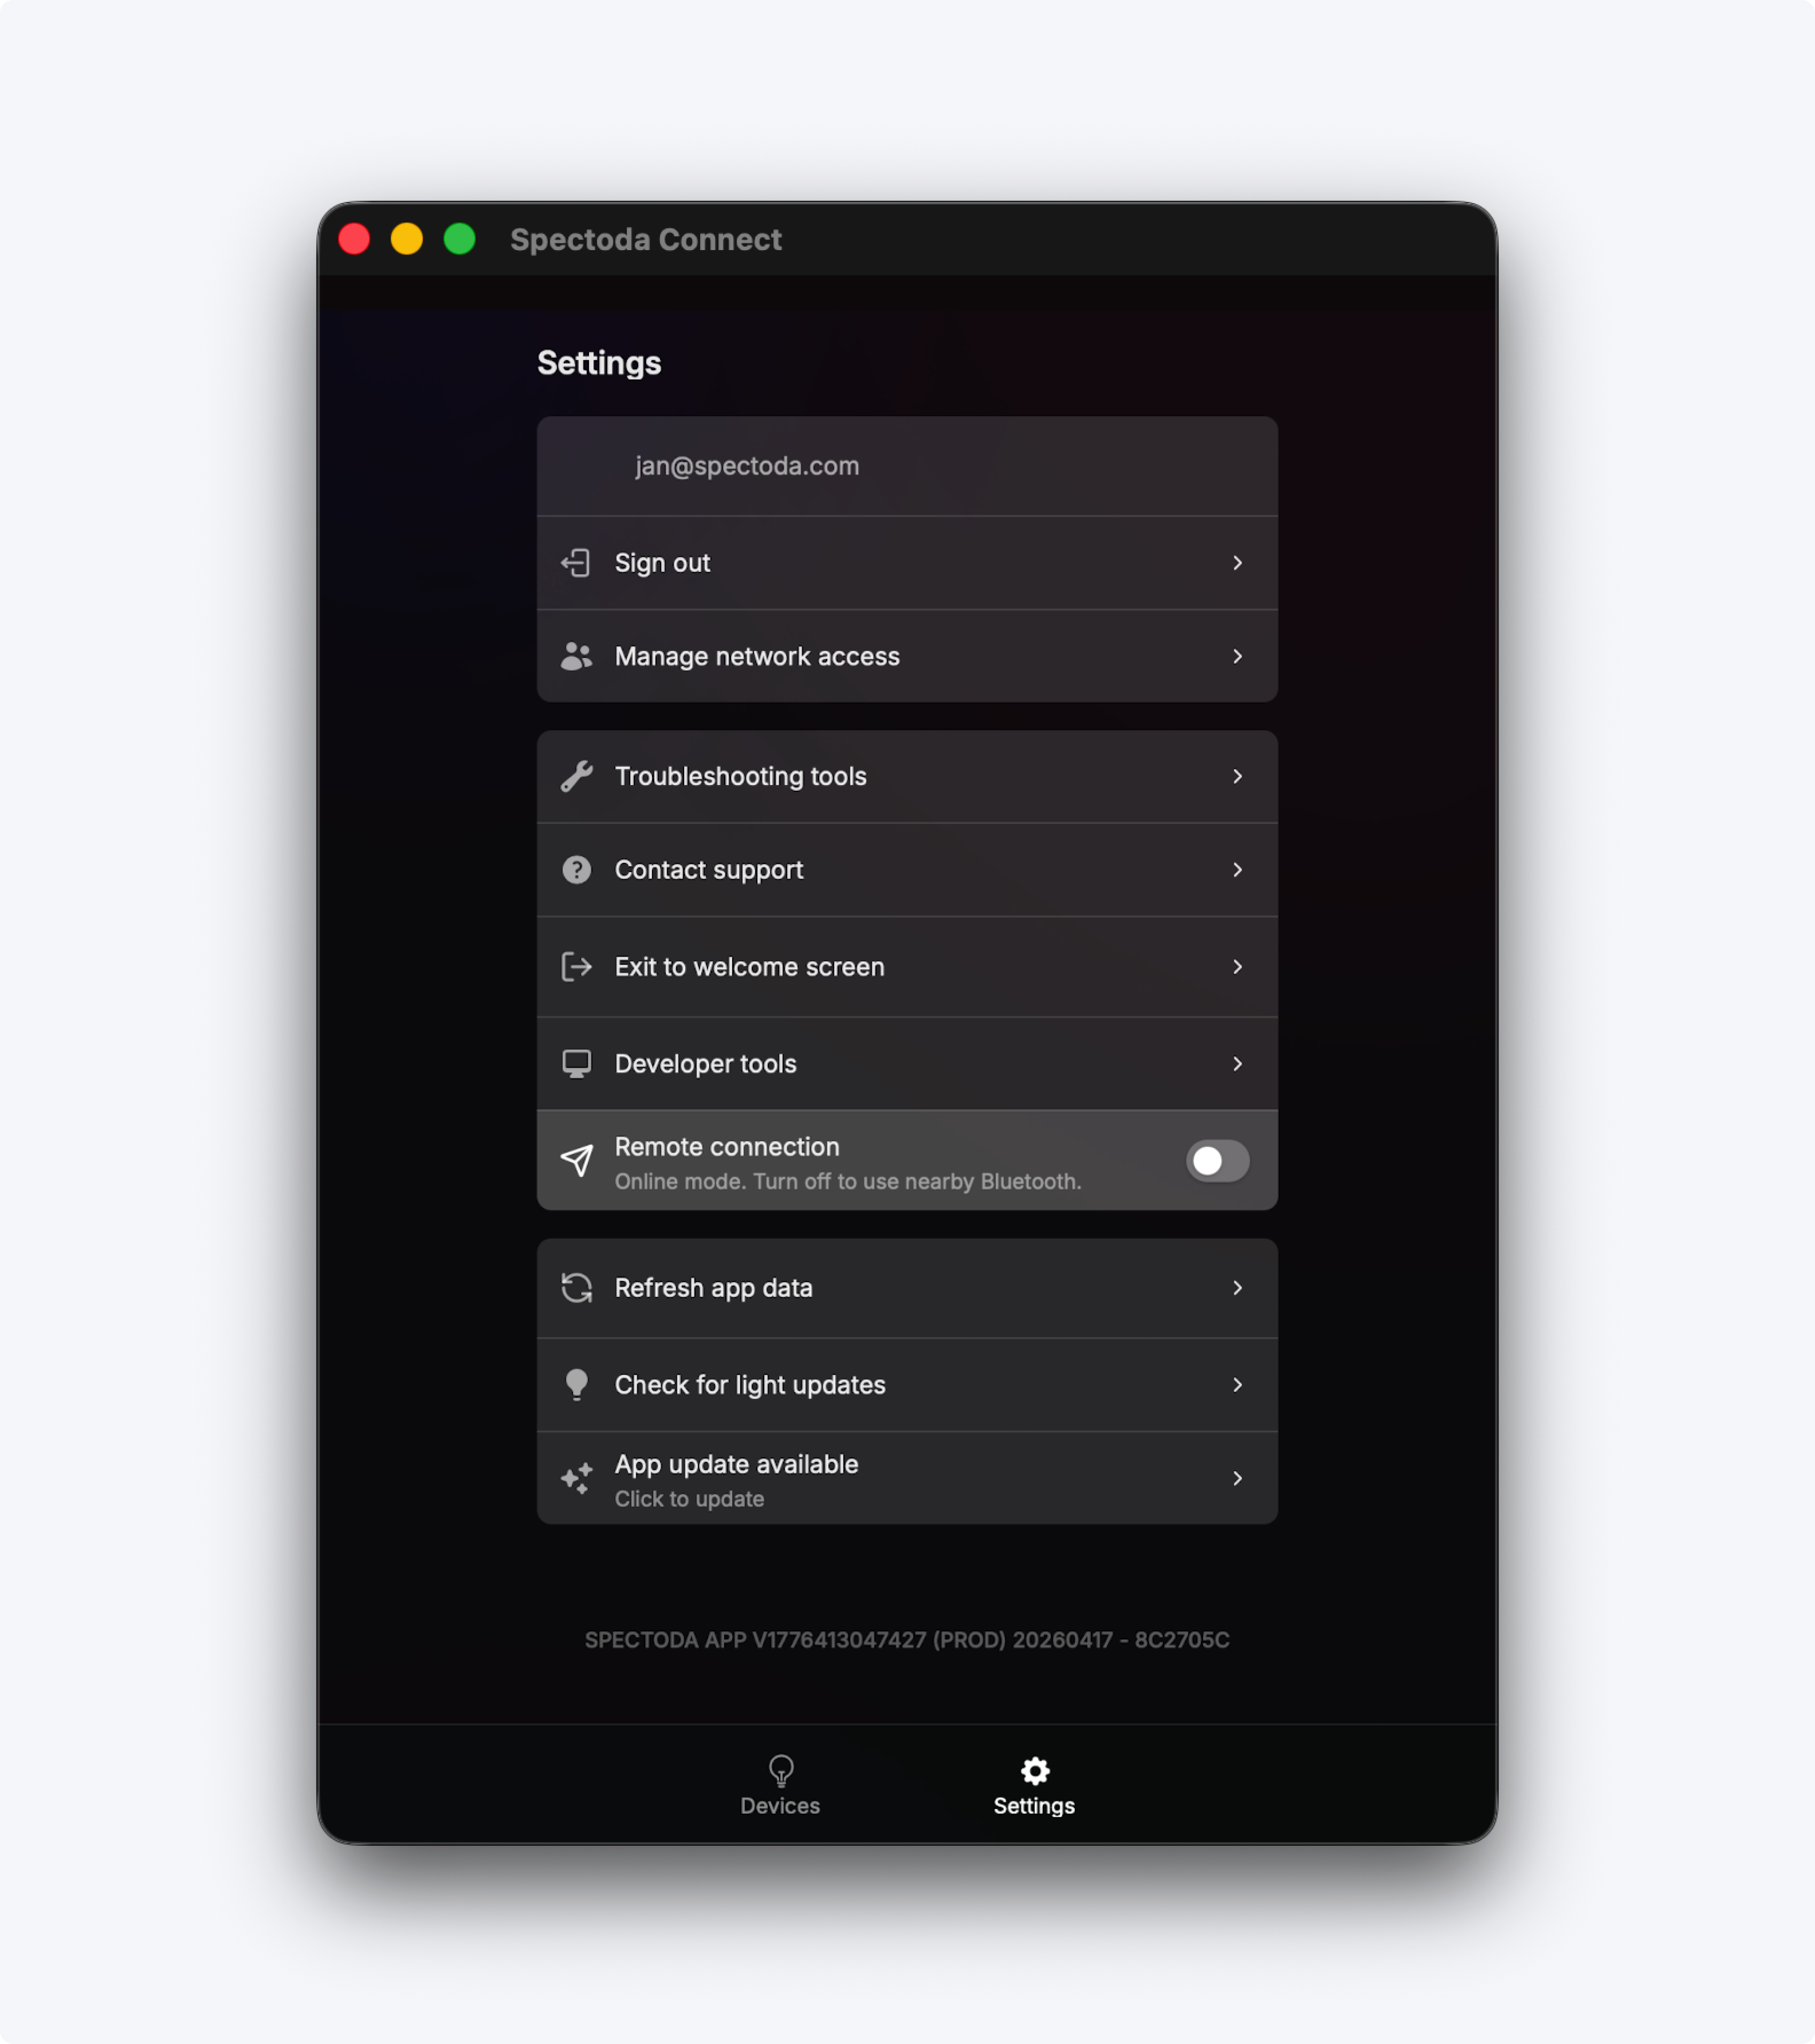
3. Go to Settings
Section titled “3. Go to Settings”After opening the network, go to Settings.
4. Find Remote connection
Section titled “4. Find Remote connection”In the middle part of the screen, find Remote connection.
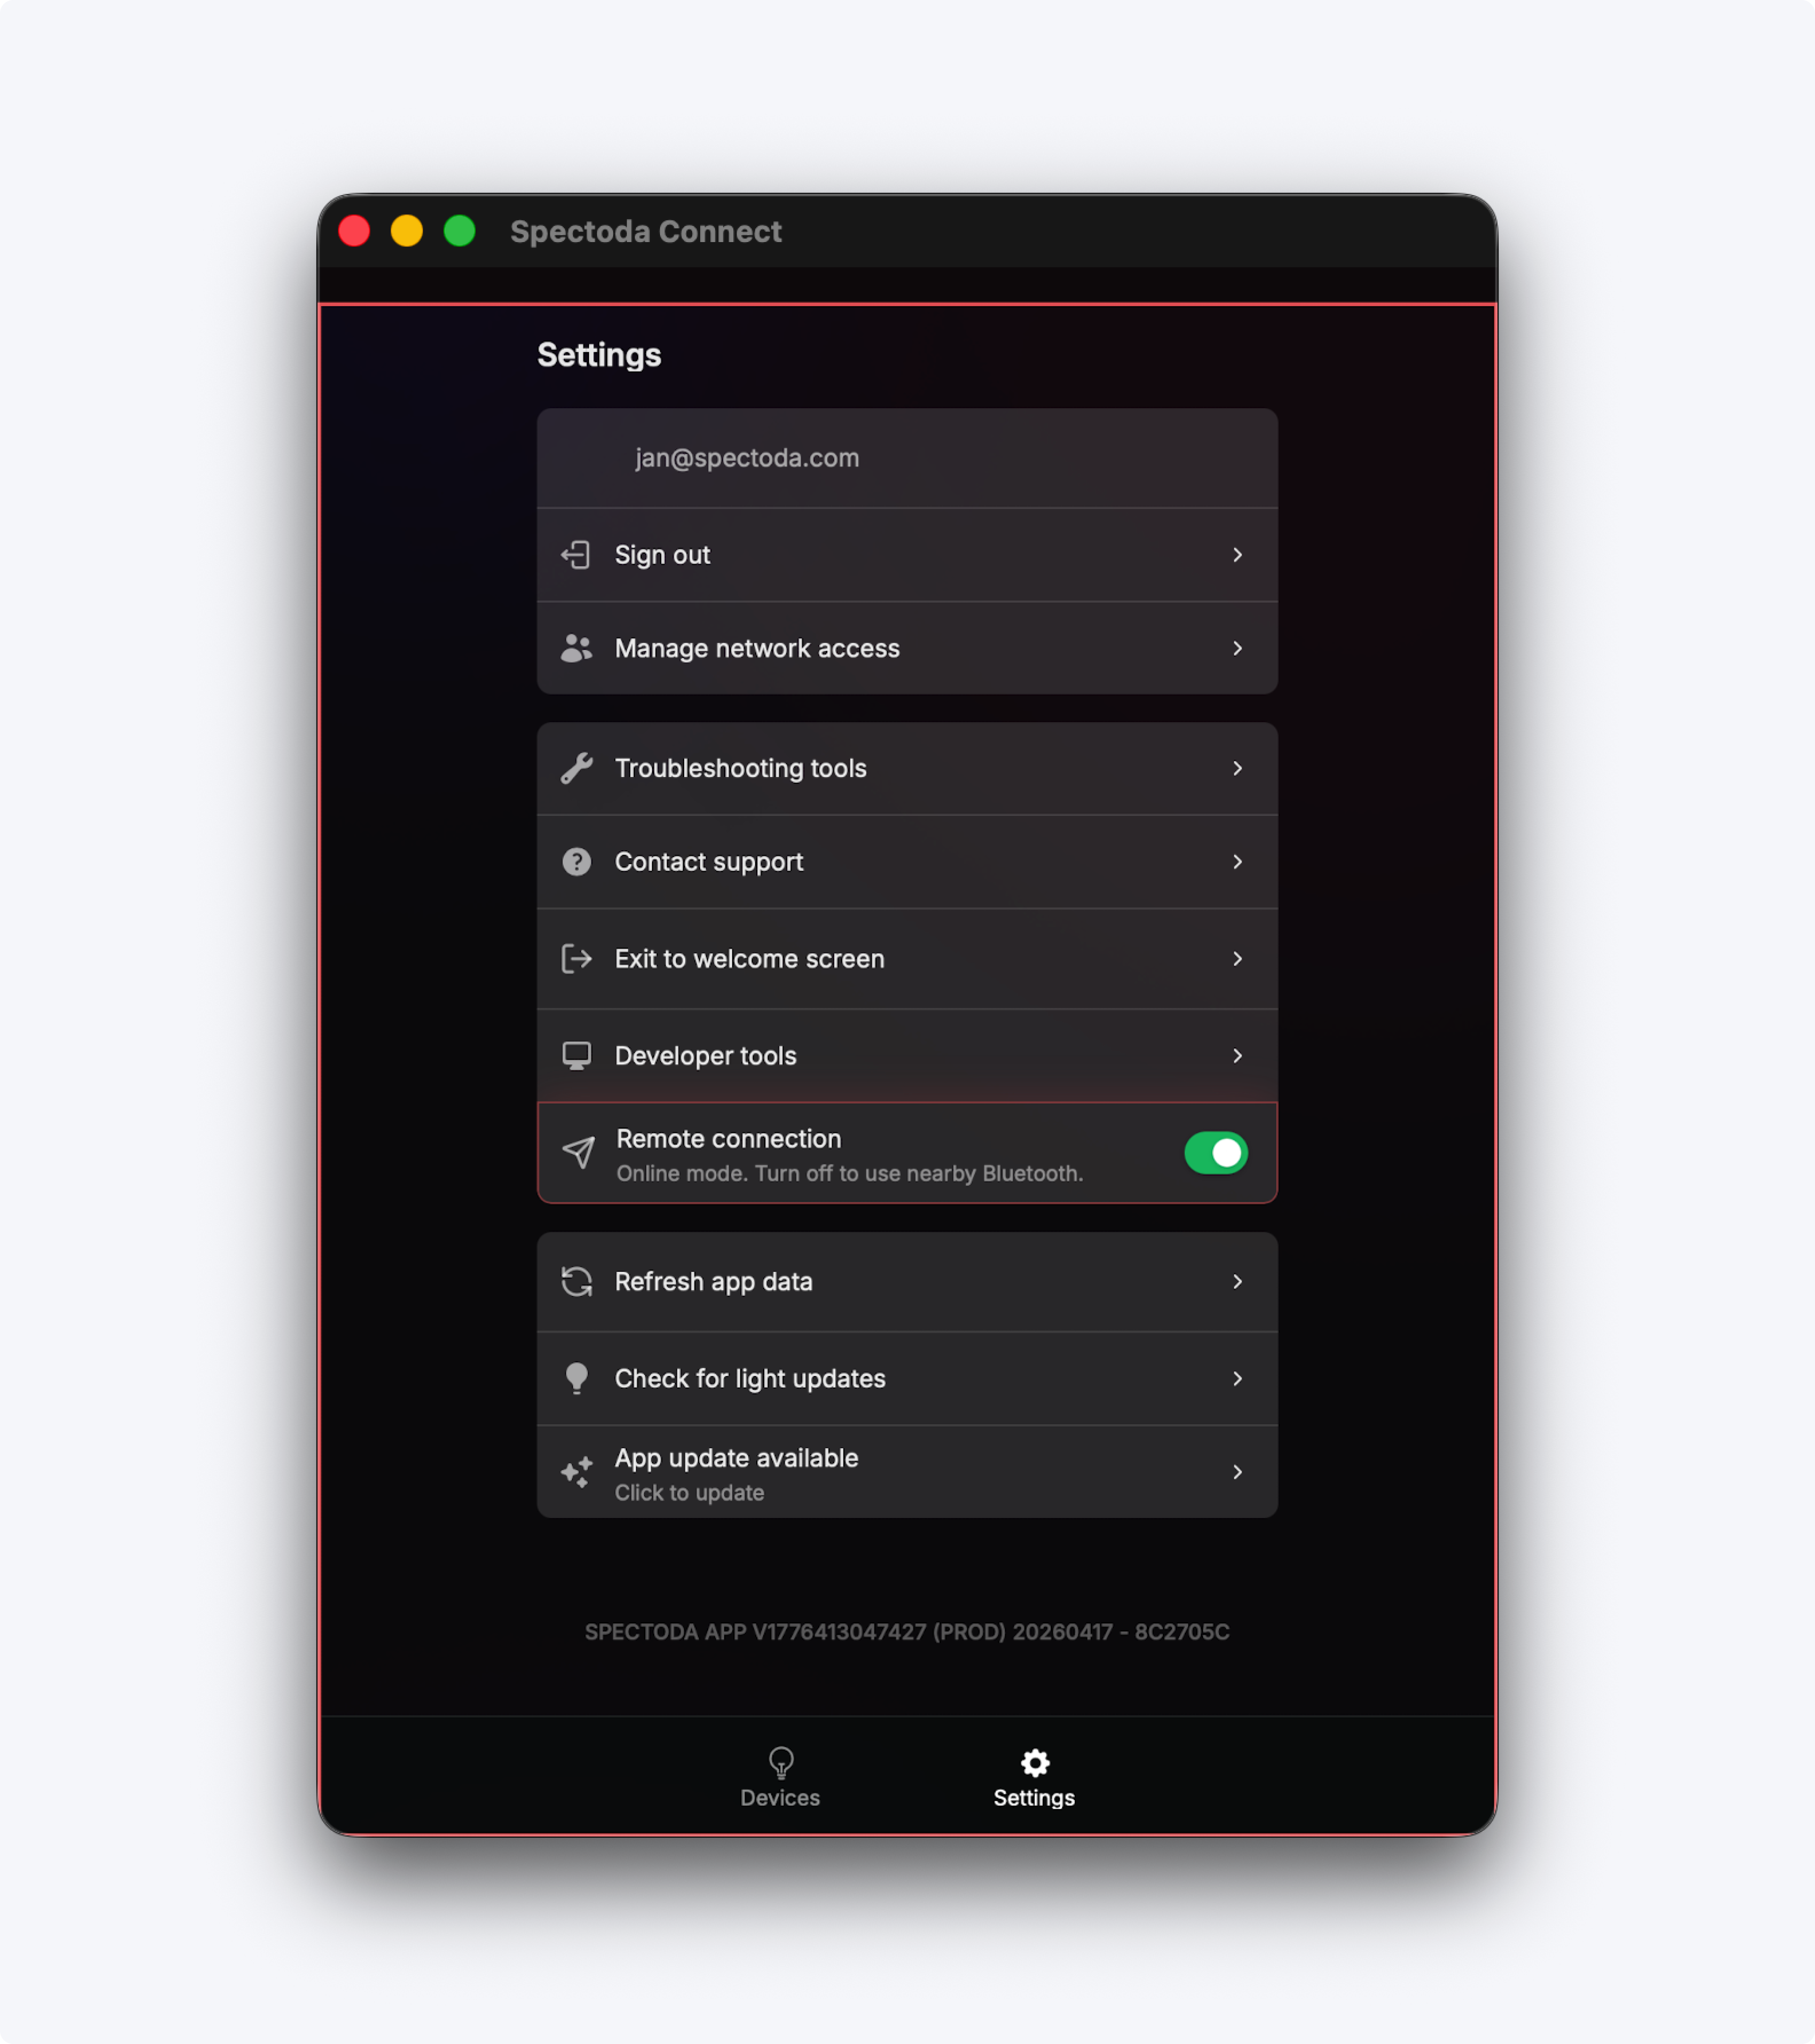
5. Enable Remote connection
Section titled “5. Enable Remote connection”Turn the feature on by tapping the slide button.
After it is enabled, the button turns green and an orange border appears around the app.
6. Return to Devices
Section titled “6. Return to Devices”After enabling the feature, return to Devices.
You can now control your network remotely without needing a Bluetooth connection to the controllers.
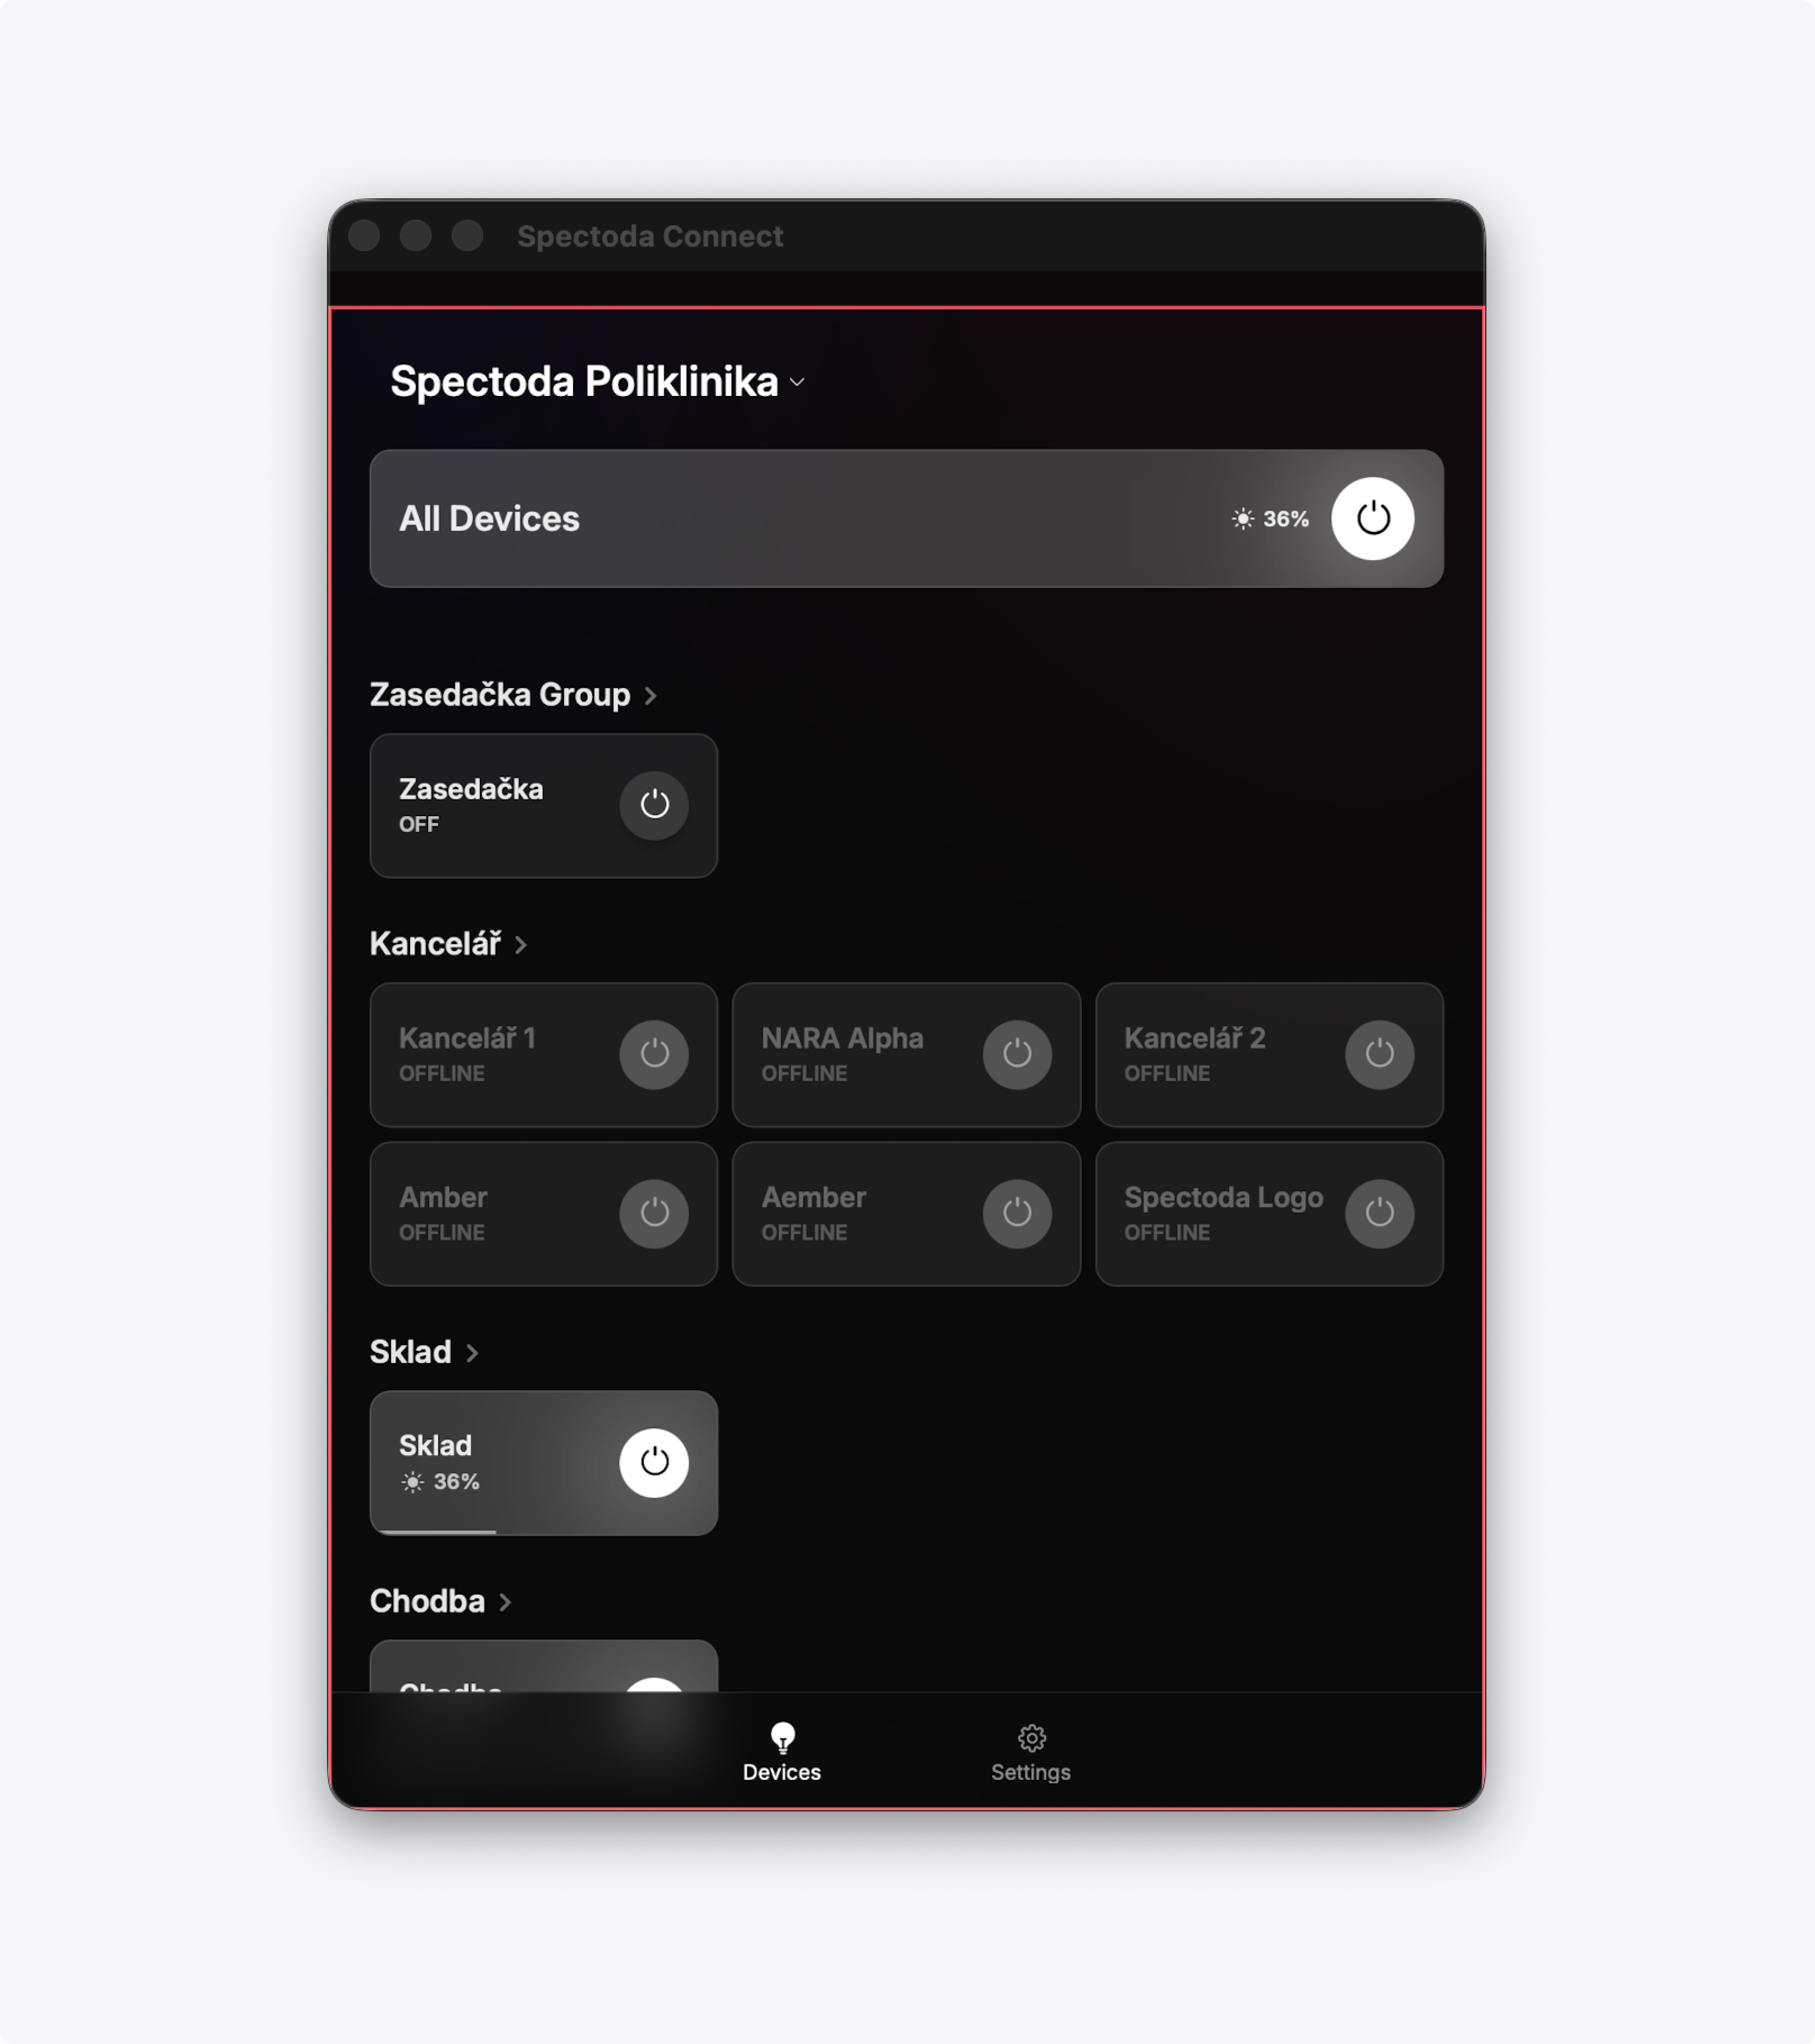
How to tell that the feature is active
Section titled “How to tell that the feature is active”- An orange border appears in the app.
- The network is prepared for remote access.