Update a controller from FW 0.9.X to FW 0.12.X
Step-by-step migration guide for moving a controller, its config, and its project from FW 0.9.X to FW 0.12.X.
What changes during this migration
Section titled “What changes during this migration”Moving from FW 0.9.X to FW 0.12.X is not just a regular firmware update. In practice, it consists of three follow-up steps:
- OTA update the Controller from FW 0.9.X to FW 0.12.X in the legacy Studio
- migrate the Controller config from 0.9 configs to 0.12 configs in Main Studio
- migrate the project so it no longer uses deprecated blocks
Until all three steps are completed, the project may not behave correctly in the newer Studio environment.
When to use legacy Studio and when to use Main Studio
Section titled “When to use legacy Studio and when to use Main Studio”Use this simple rule:
- if the Controller is still on FW 0.9.X, connect through studio.spectoda.com
- once the Controller has been updated to FW 0.12.X, continue through main-studio.spectoda.com
So the firmware update happens first in the legacy Studio, and only then do you continue with config and project migration in Main Studio.
1. OTA update the Controller to FW 0.12.X
Section titled “1. OTA update the Controller to FW 0.12.X”- Open studio.spectoda.com.
- Connect to the Controller that is running FW 0.9.X.
- Start the OTA update and update the Controller to FW 0.12.X.
- Wait until the update finishes completely and the Controller boots again.
The practical goal of this step is simple: move the Controller from the historical FW 0.9.X line to a firmware generation that Main Studio can work with.
If you are migrating multiple Controllers in one installation, it is safer to finish the firmware update on all affected units first and only then continue to the next migration step.
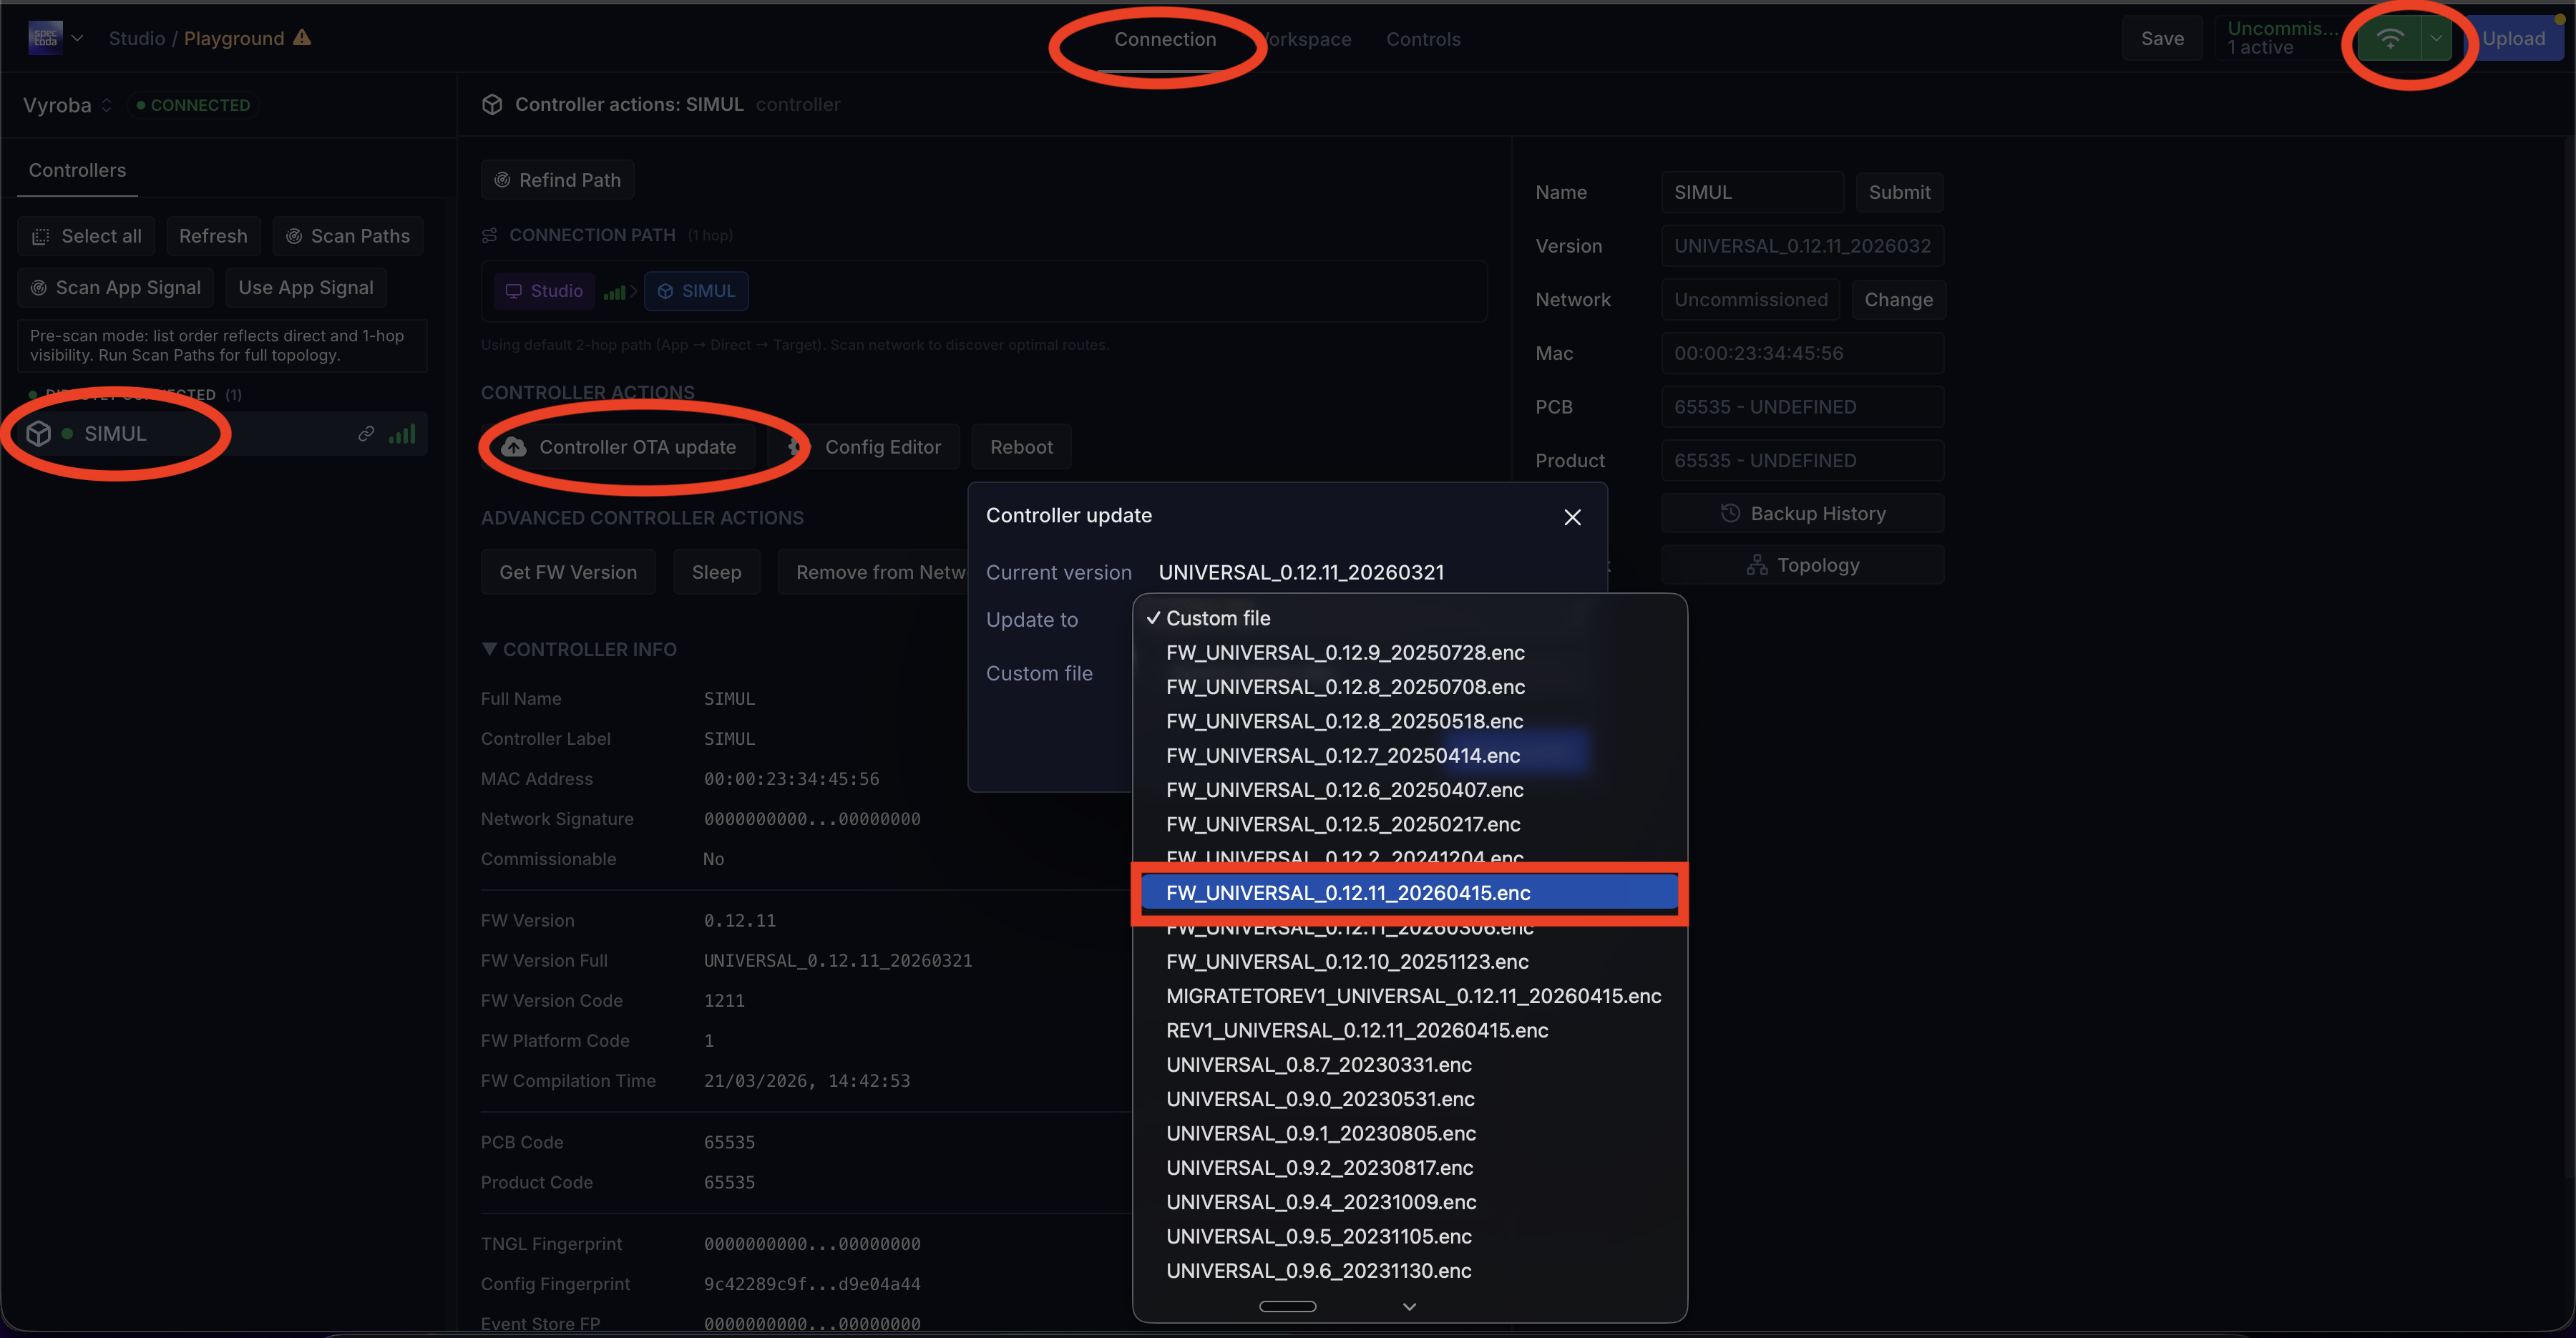
The screenshot highlights where to open the Controller connection in the legacy Studio and where to start the Controller OTA update.
2. Migrate the Controller config from 0.9 to 0.12
Section titled “2. Migrate the Controller config from 0.9 to 0.12”- Open main-studio.spectoda.com.
- Connect to the updated Controller.
- Migrate the Controller config from 0.9 configs to 0.12 configs.
- Save and confirm the changes so the Controller is running on the new config layer.
This step matters because a firmware update alone does not automatically mean the Controller is already using the FW 0.12.X config model.
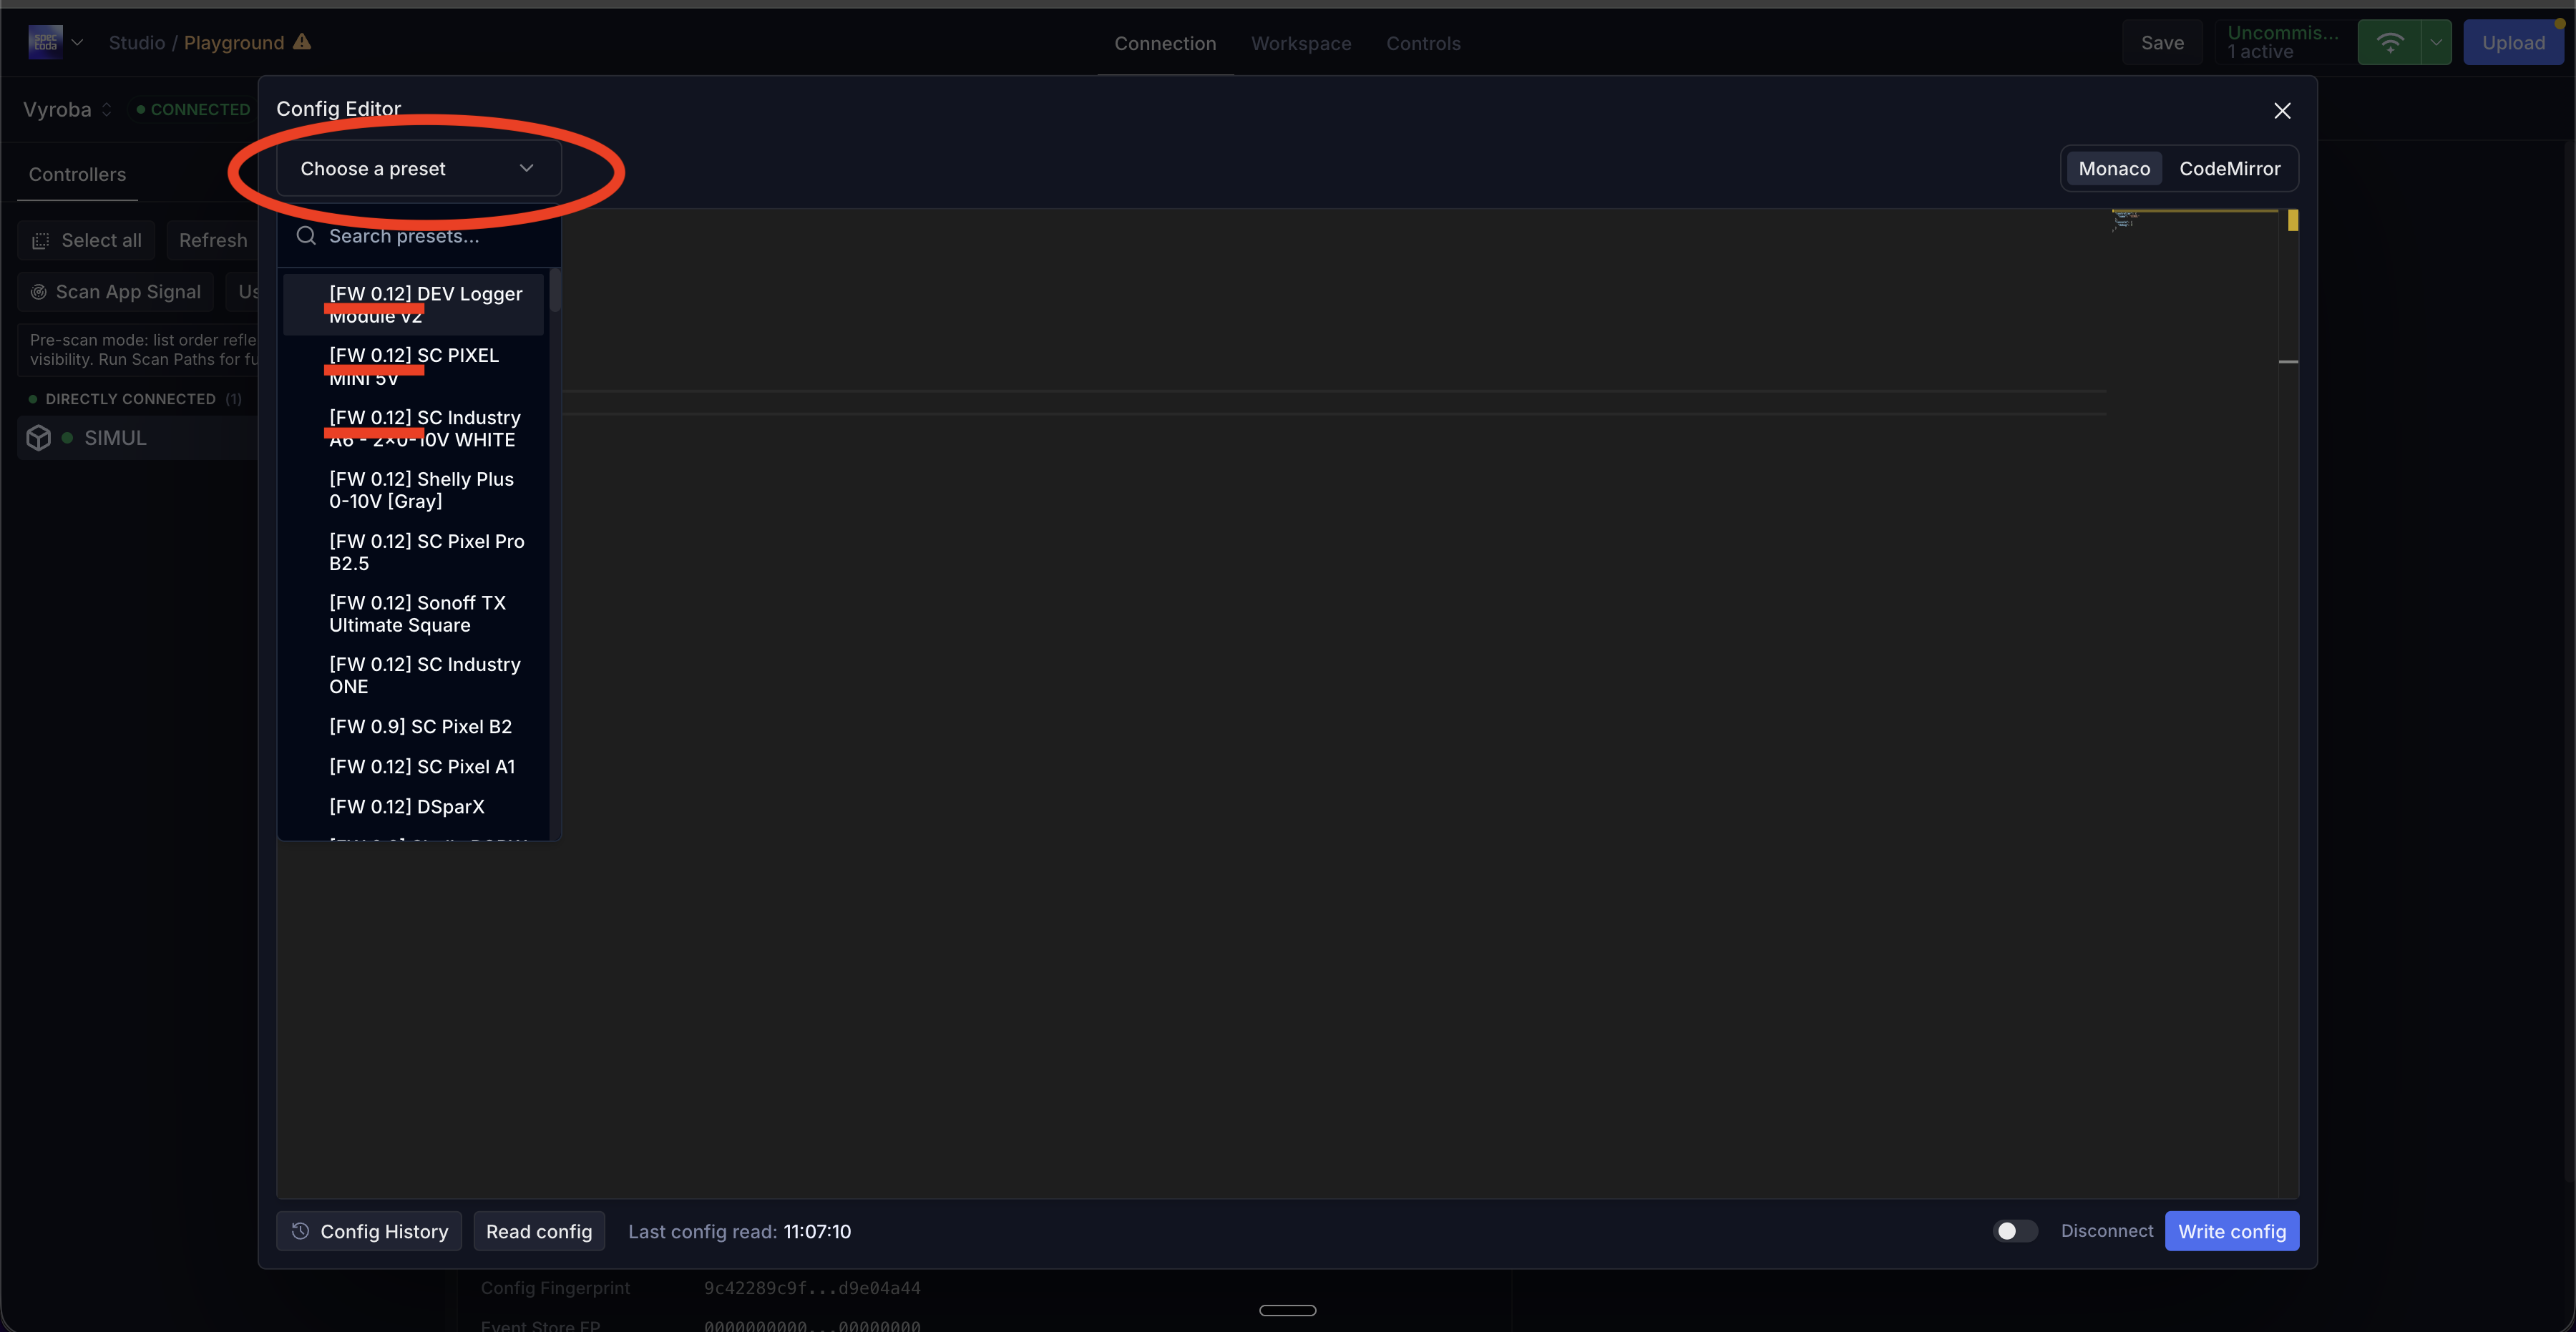
The screenshot shows the Config Editor and the FW 0.12.X preset selection used to move the Controller config from the old format to the new one.
3. Migrate the project in Main Studio
Section titled “3. Migrate the project in Main Studio”- Open the project in main-studio.spectoda.com.
- Find all red deprecated blocks.
- Replace them with the new blocks that correspond to FW 0.12.X and Main Studio.
- Review the project after the changes and save it.
At this stage the work is no longer about the Controller firmware itself, but about the project logic. Blocks from the FW 0.9.X era may appear as deprecated in Main Studio and have to be replaced manually with their newer equivalents.
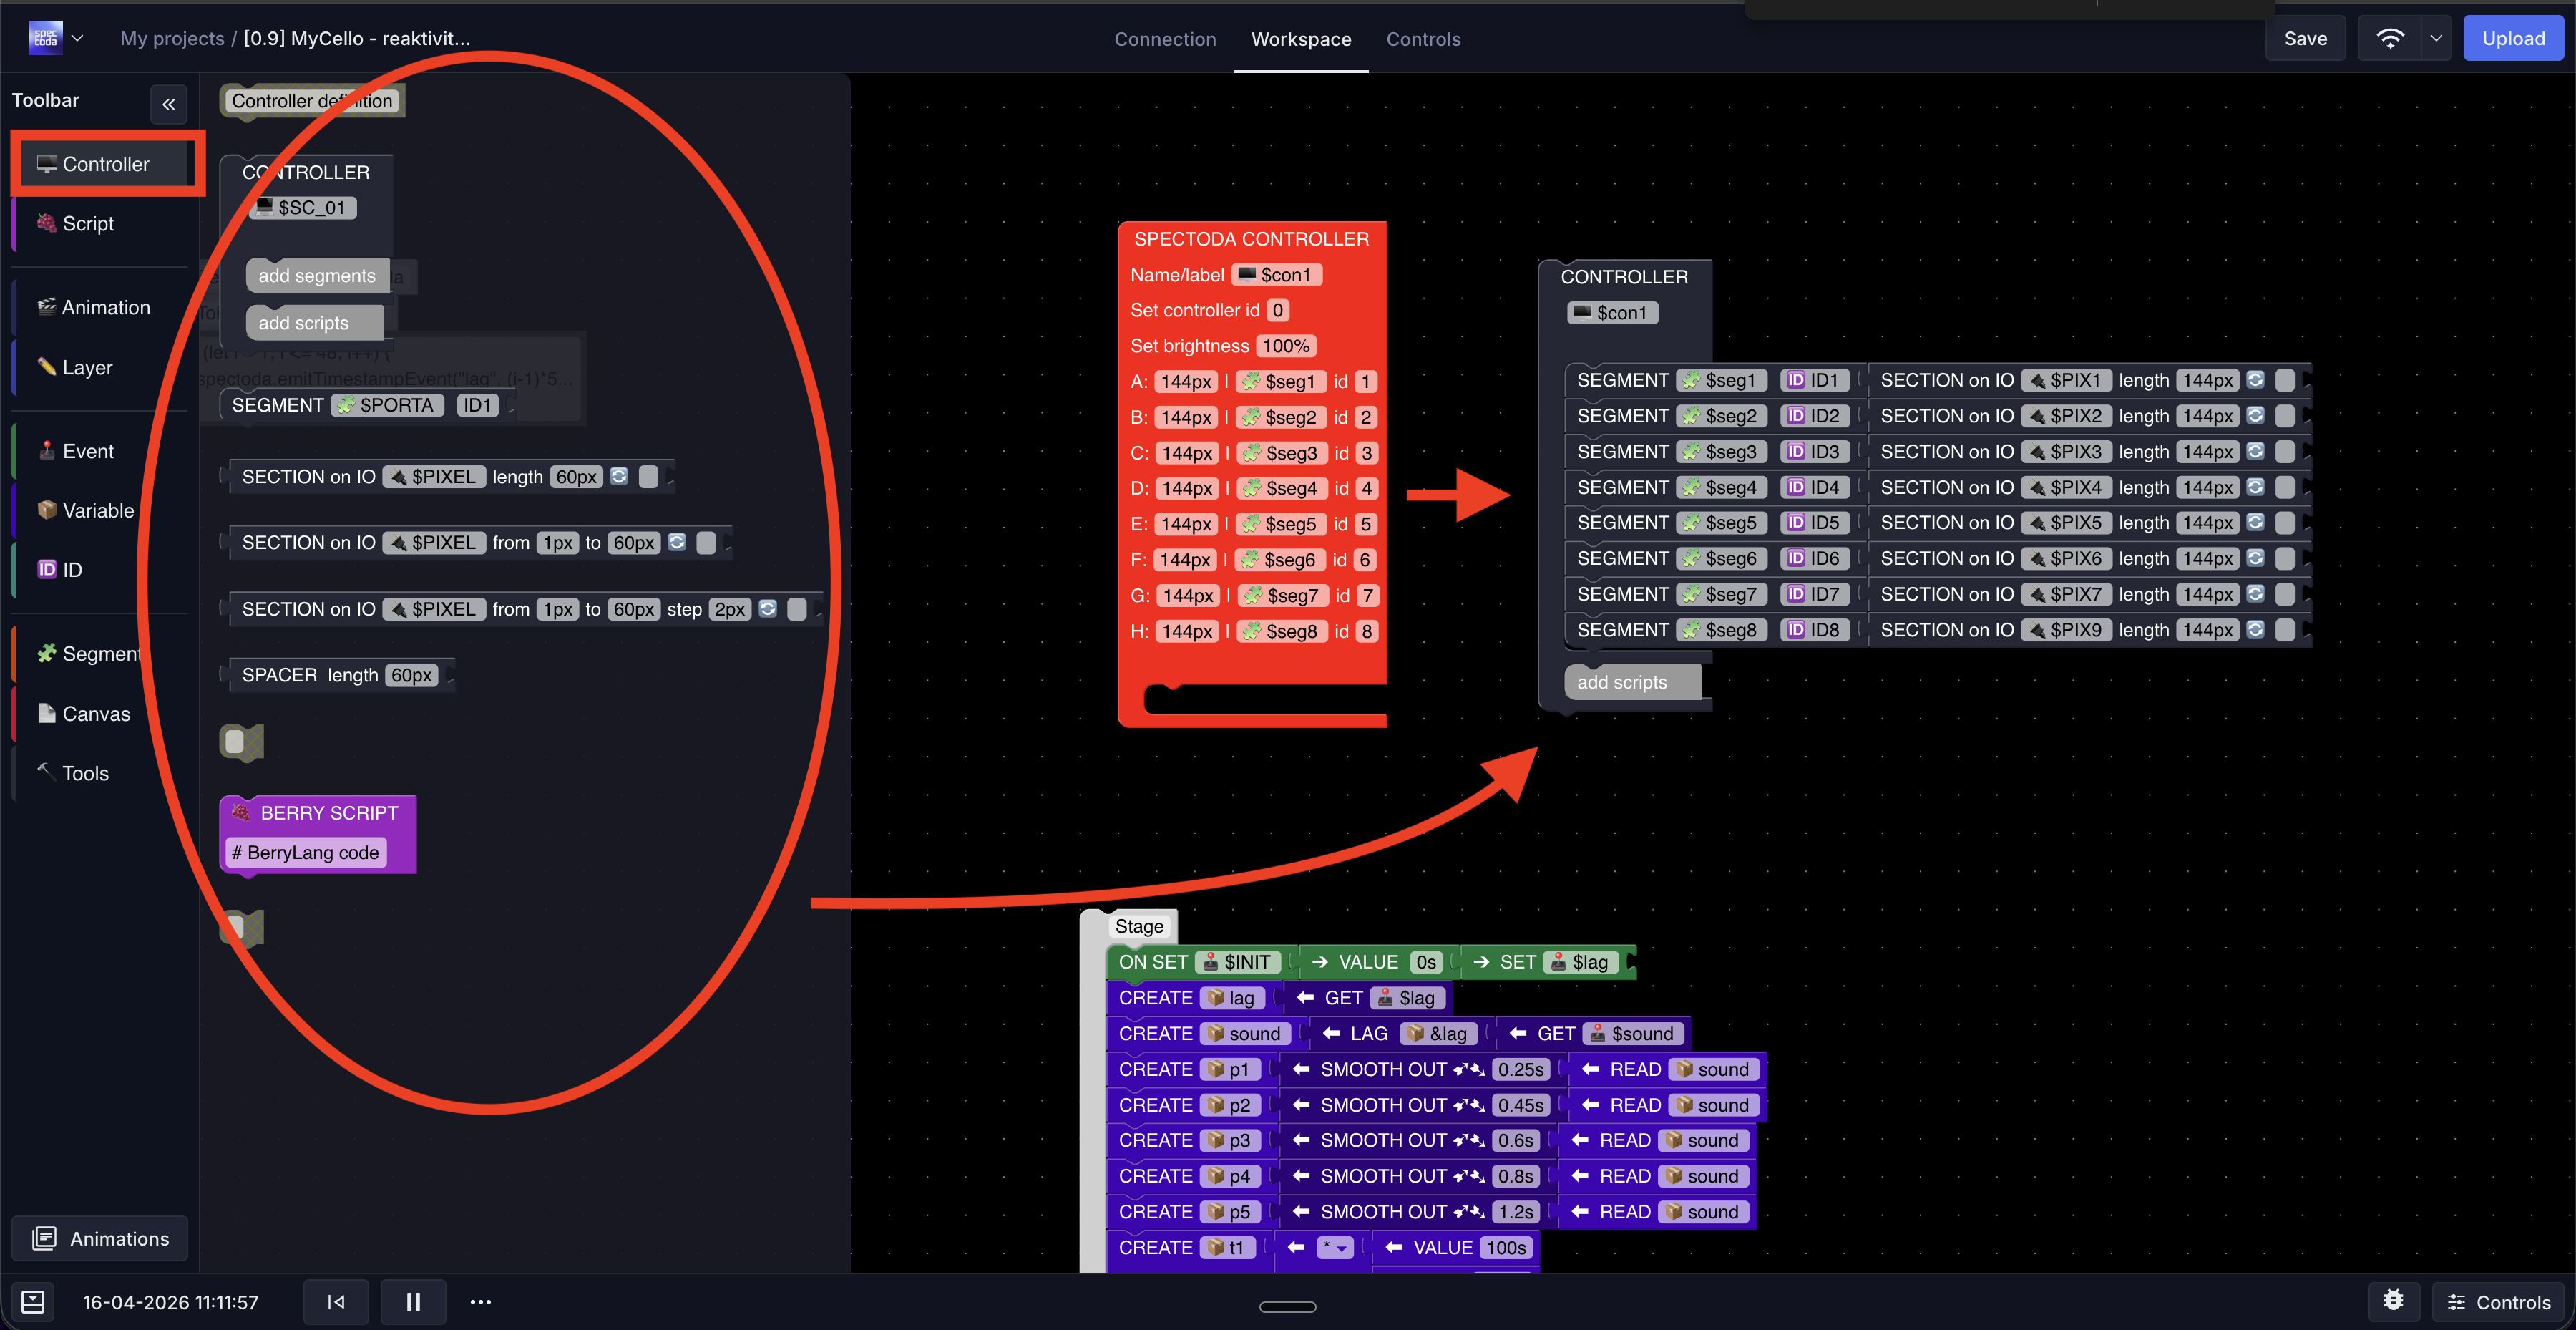
The screenshot shows an example of converting an old controller block and related project structure to the newer Main Studio setup.
Migration checklist
Section titled “Migration checklist”The migration is complete only when all of the following are true:
- the Controller is no longer running FW 0.9.X and is now on FW 0.12.X
- the Controller is now serviced through Main Studio, not the legacy Studio
- the Controller config is no longer in the old 0.9 format
- the project no longer contains any red deprecated blocks
- the installation has been functionally checked after opening the project in Main Studio
Most common practical mistake
Section titled “Most common practical mistake”The most common misunderstanding is assuming that the OTA firmware update is enough by itself. For this migration, it is not.
If, after the firmware update:
- you do not migrate the Controller config
- or you do not migrate the project and replace deprecated blocks
then the Controller may already be on a newer firmware line, but the overall project still will not be fully migrated into the FW 0.12.X and Main Studio environment.